10 Ways to Get a Designer Look in Your Home
Have you ever walked into someone’s home and thought to yourself “Wow, this looks so nice! It’s like a magazine!” Then you inevitably think, “why can’t my house look like this?” Guess what? It can!! Now, I know that most of you here in western Massachusetts, and most of my clients, in Monson and the surrounding towns, have never worked with an interior designer before, so, we’ve got your back. If you think you want to tackle your home on your own, we’ve got some designer tips on how to make your home look like a designer did it. We’ve got tips and tricks that we use when we design spaces for our clients! And we’re spilling all the details here.
Tip number 1 – Mix it up!
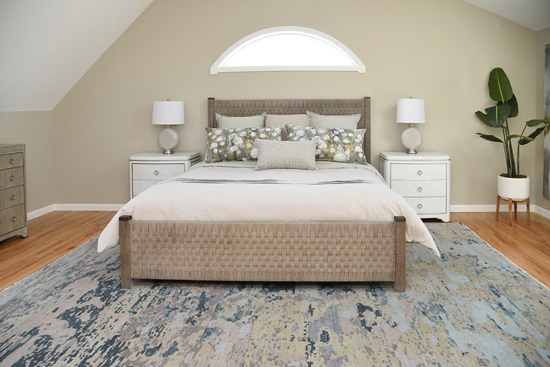
Forget the matchy, matchy furniture. No more buying sets of furniture like your parents used to! Go for pieces from different furniture collections, or different finishes from the same collection. You end up with a home that feels like it’s been decorated over time. Take the bedroom below for example. The nightstands and the dresser are from the same collection, but the dresser is in a different finish. It makes your eye move around the room and it’s more interesting to look at than it would be if they were all the same color and finish. The dresser is also a similar color to the bed so they really work well together. The bed is actually from a completely different collection by the same manufacturer. If it were the same, the room would look like a furniture store display and not really collected.
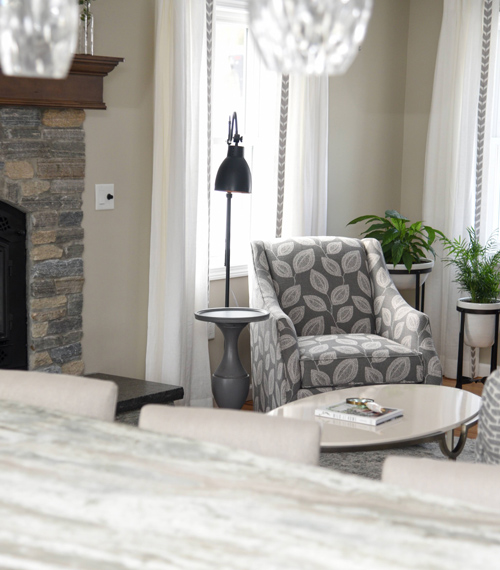
Tip number 2 – Art & Accessories Scale!
This one is huge! It’s one of the mistakes that I see homeowners make the most frequently. So many times, we see a bunch of tiny little tchotchkes decorating a room. Really you need to GO BIG. Choose art and accessories that are a little bigger than you think you need. Let them make a statement. When you have a ton of little tiny things, it gets really busy. Instead, use one large item, or a group of 3 different sized objects. When you have a big wall, like a wall above a sofa or over a bed, use a big piece of art! Take up the empty spaces, but be deliberate about it!
TIP ALERT – A good rule to follow is to use up at least ⅔ of the space with the art.
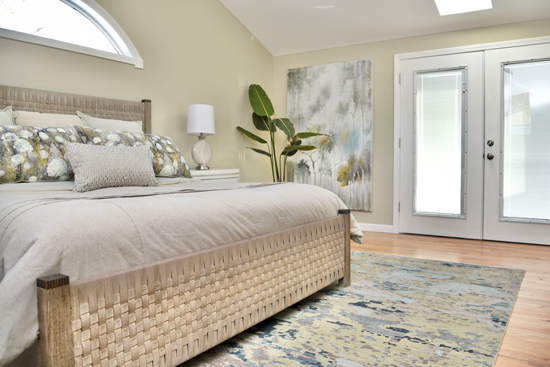
In that same bedroom, there was a big, empty wall to the right side of the bed. The art that we chose takes up the whole wall and balances out the furniture. It also has the same colors in it that are on the pillows and on the rug, so it all blends together nicely.
Tip number 3 – Layering!
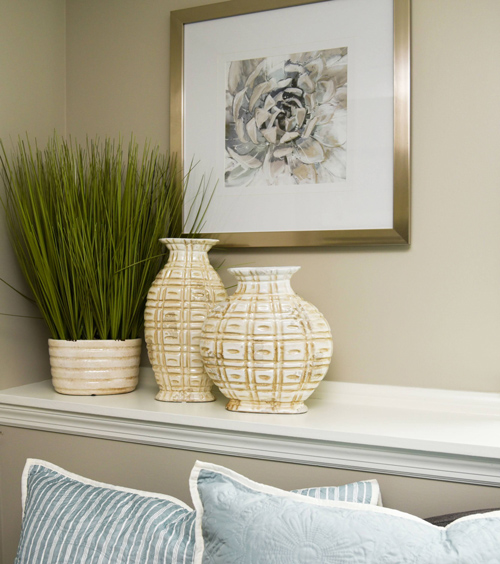
When it comes to accessorizing, use varying sized objects in a grouping.
TIP ALERT – Remember the rule of odd numbers. Placing items in groupings of 3 or 5 is known to be pleasing to the eye.
Layer pillows, art, accessories, etc. Layer items in front of each other. Put a lamp in front of art with a vase, or add a plant. Just make sure that they vary in height and size and even texture.
Tip 4 – Layered lighting.
Just like layering your accessories, your lighting should be layered too. That means that there should be different kinds of lighting, depending on the type and use of the room. Even if you have overhead lighting, you should still have lamps in the room for reading, etc. It’s all about having three different layers: general lighting, accent lighting and task lighting. General lighting, such as recessed lighting throughout the room, lights up the whole area. Accent lighting is for decorative purposes. Rope lighting or sconces are examples of accent lighting. It’s either used to highlight an item or add “mood” lighting essentially. Lastly, task lighting is just that, for tasks. Pendant lights over your island or under cabinet lighting to make sure you don’t cut yourself while making dinner are considered task lighting. Floor lamps for reading are also task lighting. Any type of light that you use to make sure you can see what you’re doing. We see so many rooms that only have one light in the middle of the ceiling. You need the three layers to complete the room.
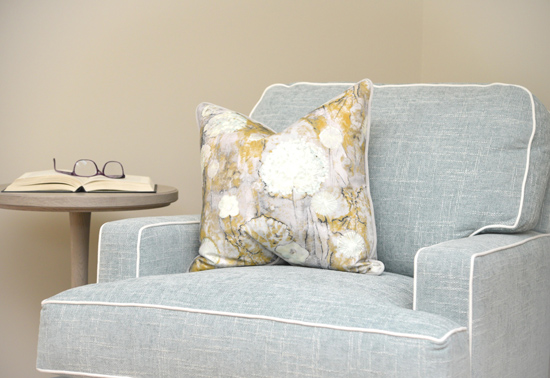
Tip number 5 – Custom furniture.
Believe it or not, custom doesn’t have to mean expensive. A lot of people don’t realize that they can go into a furniture store and buy a sofa in whatever fabric they want. You don’t have to have that gray sofa that looks like everyone else’s sofa. Be creative! You can select a pretty performance fabric (like we talked about in our family room blog HERE) for the main body of the sofa in whatever color you want, then you can select your pillow fabrics to add color and pattern, add a contrasting welt (the white line you see along the edges of the chair below), or add nailhead trim! You can end up with a piece of furniture that no one else has, and for a reasonable price.
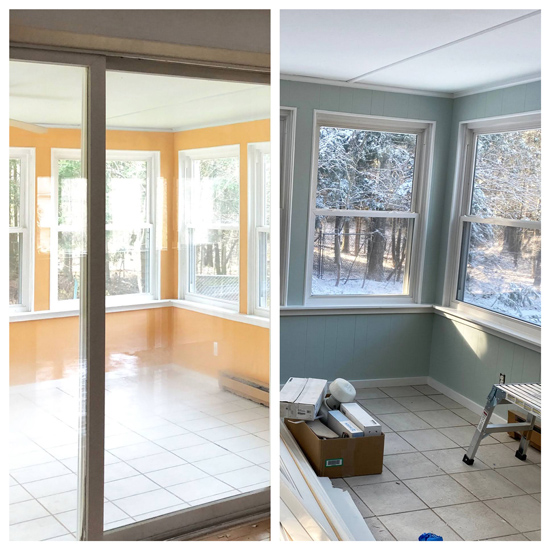
Tip 6 is Paint.
So many people pick a color that’s too light.
TIP ALERT – Always go a shade or two darker than you think! If you’re looking at a tiny swatch on the wall and comparing it to your current wall color, it’s scary, I know! But trust me, it won’t be as dark as you think. And if it ends up not being what you wanted, it’s just paint and it can be redone. If you’re struggling with paint color we’ve got you covered there too with our 10 Foolproof Paint Colors. This sunroom below used to be that awful orangey color. Now it’s a soft shade of blue-green! If it were a lighter shade, it may have just faded away and almost looked white, especially with all of the light that comes into this room. But we went a shade darker on the swatch and the color is perfect. It feels fresh and bright, not dark at all.
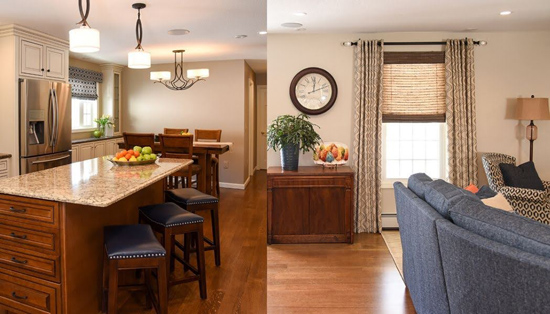
Tip number 7 is Flow.
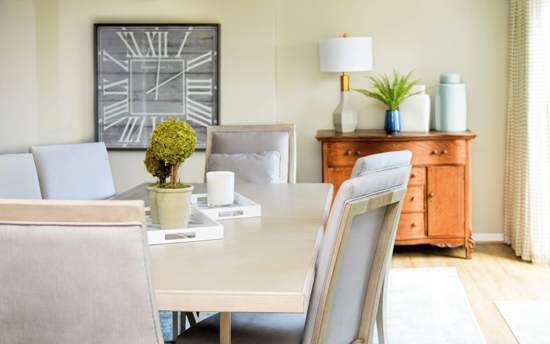
All of your rooms should flow together. You don’t want to have one purple room and then one green room, followed by a blue room. When you’re walking through your home, you want it to feel cohesive with one room flowing to the next. This can give you more of that open concept feel that everyone is looking for. It doesn’t have to “match” persay, but they should coordinate. The photo below shows a kitchen/dining room and a family room. They are all adjoining, but the colors are slightly different shades that work well together. You don’t have to use the same color throughout your entire house, but if you choose different shades of the same color you know they will look nice together.
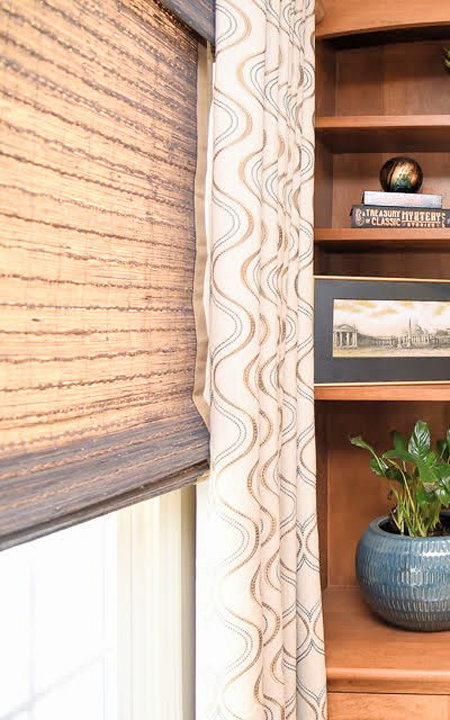
Tip 8 is Window Treatments.
Before you go buy a pair of curtains to hang on the window, really think about what you need in that space. Do you need privacy? Does a lot of light come in that window? Consider everything before making a decision. Take a look at the Window Treatment Do’s and Don’ts tip sheet HERE for some drapery ideas! Make sure your draperies go all the way to the floor, and layer your window treatments if you need privacy. Layering is a common tip as you may have noticed! By layering window treatments, I mean to pair drapery panels (stationary is fine) with some sort of shade underneath. Roman shades or woven shades look really pretty paired with draperies. For everything you need to know about window treatments, take a look at THIS blog post. It really spells everything out for you and there are TONS of tips.
TIP ALERT – To get a designer look you really need custom draperies. Really. You cannot get a designer look with store bought draperies. Sorry. You know I always share with you how to save money but this one is non negotiable. Store bought draperies simply don’t hang well and they’re almost never the right size.
Tip number 9 is Measure!
Know your measurements before buying ANY furniture! Draw out the room on a piece of paper and just write down the general measurements of the room. If you have any furniture that’s staying, measure that too. For example, say you’re going to buy a sectional. You’re going to need to know the usable space you have, taking into account walkways, doorways, windows, TV’s, other furniture, etc. When you go shopping, give the measurements to the salesperson. They can most likely help you determine what will fit in your space. Depending on the store, they may even draw it up for you. The worst feeling is waiting 6-8 weeks for your custom furniture, only to have it arrive and not fit in the room. Know your measurements!!
Lastly, number 10 is Layout.
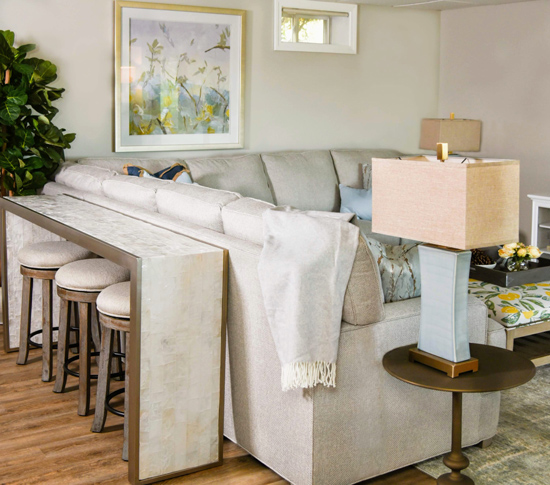
Don’t put all your furniture under arrest! It doesn’t all have to be up against the wall! If you have a room that’s large enough to pull the furniture away from the wall, do it! Even if you just pull the sofa in enough to add a console table behind it. It’ll add some depth. Have you ever arranged your family room and realized that all your seating is up against the wall and now you have no place to put the TV? Take the largest piece of furniture (sofa or sectional) and turn it to face the wall. Now that frees up the wall for the TV and you have a nice cozy seating area! Don’t be afraid to have the back of a sofa showing. You can add a sofa table with some accessories to jazz it up, or even a console table with stools like below. I actually have this set up in my own family room. When we have friends over to watch the Patriots they call those seats the bleacher seats. You can also check out this eBook for 7 Steps to a Well Designed Room for some great ideas on how to put an entire room of furniture and accessories together.
Ok, you’re ready to tackle your own room now right? To recap, mix it up, scale, layering, layered lighting, custom furniture, paint, flow, window treatments, measure, and layout. Got all that? Don’t worry, you don’t have to memorize it all. You can pin this post to come back to it later by clicking the pinterest pic below 😉
Or, of course, you can always book a Consult with us to go over it all right in your own home. Find out more